Configure SecondSite Interzone For VDC

Step 1 – Login and select VDC
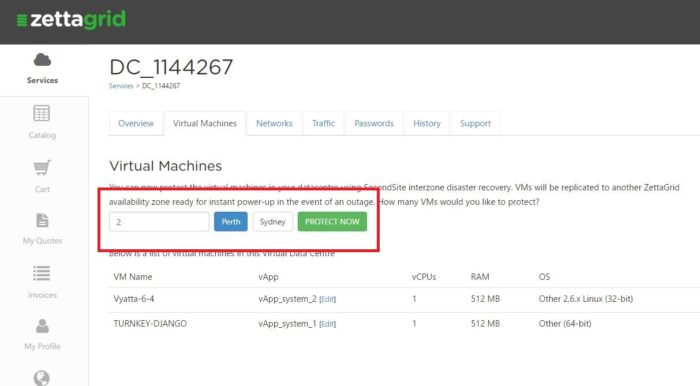
- Log into MyAccount
- Open up the VDC that has the VMs you wish to protect via SecondSite Interzone replication.
- As seen below choose the number of VMs you wish to protect, the zone you would like them replicated to and hit Protect Now.
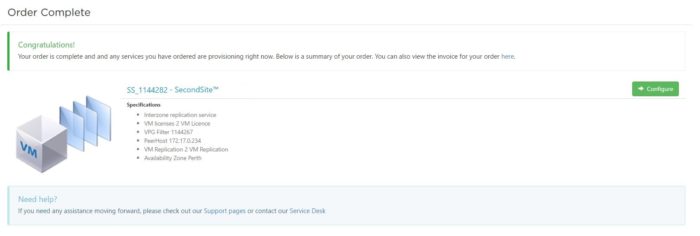
Step 2 – Purchase
Follow through the payment gateway and confirm your selection.
Step 3 – Interzone Configuration
Go back to your MyAccount page and witness that a new VDC with the prefix SS is being provisioned and appears as below.
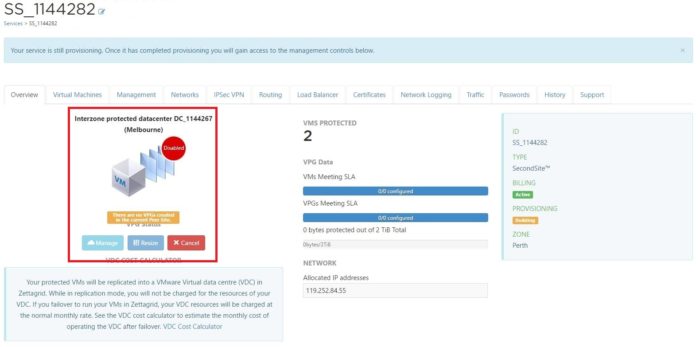
As you can see it is highlighting a few important items;
- The VDC it is protecting
- An alert that there are currently no VPGs created
- The number of VMs you have purchased protection for
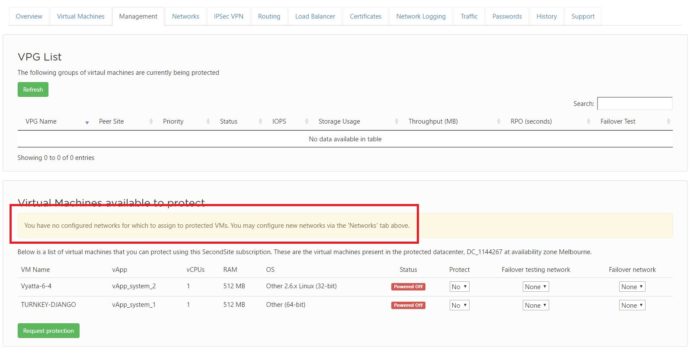
Step 4 – Virtual Machines Available to Protect
Click the Management tab and see that there are no networks created as yet.
These networks are what the VMs will be attached to in the VDC in the new availability zone. This might be the same or completely different to what they are in the current availability zone.
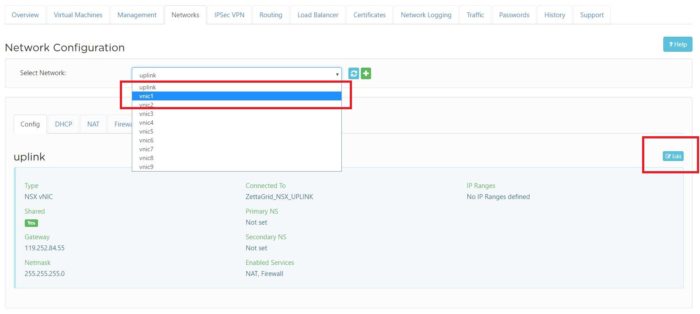
Step 5 – Network Configuration
Head to the Network tab and begin the network configuration.
Select an uplink and then hit on the edit button on the right hand side as per below.
Enter in the relevant information that you would like the production network to be. Ensure that you select to make the network Connected.
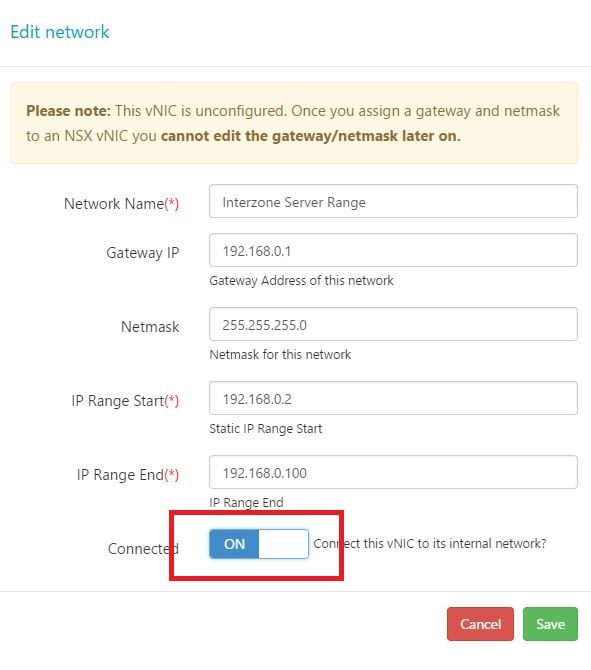
Now you have configured the production network. SecondSite also allows you to perform test failovers which are typically unrouted or internal networks that do not have any outbound connectivity. You will need to repeat the above process and create a test network for your VMs.
Please note: The networks you have created are simple the VLANs that the VMs will be tagged with. If you have advanced firewall rules, BGP or NAT rules setup in your production VDC then you will need to also create these on the new SecondSite instance as it is entirely separate from your production VDC. For assistance with that head here – Creating Networks for Interzone Replication
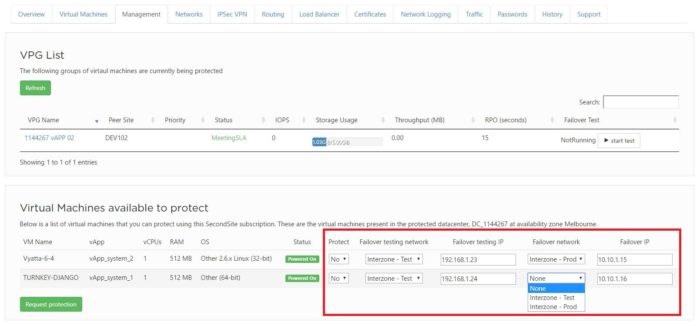
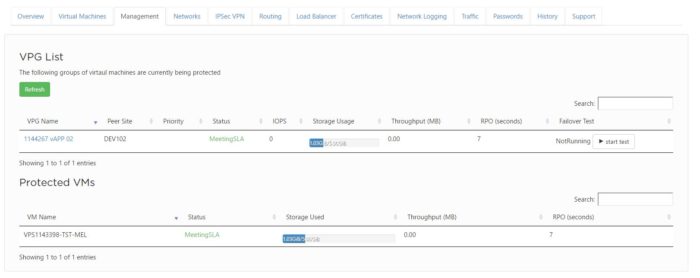
Step 6 – Enabling Protection
Return back to the Management tab and select the relevant networks and IPs for both production failover network and test failover network.
Make sure you select to enable protection for all the VMs you wish to protect and then hit Request Protection.
The VMs will now begin replicating. The initial replication can take considerable time (can be hours or days) as it will be potentially transferring multiple terabytes across the country so please be patient.
Once complete you will be able to see the status of the replication from the Overview page of the service as per below. You will be able to see how many VMs are protected and the overall information on whether they are meeting a 5 minute RPO target SLA or not.

Proceed over to the Management tab again for specific information about each VM under protection.
Congratulations you have now successfully setup Interzone replication.
For further information about Zettagrid product and service do not hesitate to contact sales@zettagrid.id or directly contact to +62-811-28-38-78 and +62-21-2789-9962